
Asphalt Driveway Installation Process: Step-by-Step
Table of Contents
What Is the Asphalt Driveway Installation Process
Site Preparation and Clearing
Excavation and Removal of Existing Pavement
Asphalt Driveway Sub-Base Requirements
Grading, Sloping, and Drainage Setup
Asphalt Mixing, Application, and Compaction
How Long Does Asphalt Take to Cure
The First 30 Days: A Day-by-Day Care Timeline
What Can Go Wrong If You Rush It
Asphalt Driveway Installation Cost and What Affects Pricing
Frequently Asked Questions
Last Updated: October 6, 2026
What Is the Asphalt Driveway Installation Process
The asphalt driveway installation process transforms a prepared site into a durable driving surface. At Advanced Paving and Sealcoating, Inc., we've guided hundreds of homeowners and businesses through it over our 20 years in Central Illinois.
It involves eight stages: site prep, excavation, sub-base installation, grading and drainage, asphalt mixing and application, compaction, curing, and final inspection. Skip or rush any phase, and your driveway won't last.
Site Preparation and Clearing
Before any asphalt goes down, the site must be cleared of debris, vegetation, and anything that could interfere with the work.
What happens during site prep:
Clear all grass, weeds, and roots
Remove loose debris and trash
Mark utility lines
Establish work boundaries and equipment staging areas
Site prep typically takes one to two days for a standard residential driveway, longer for commercial lots. A common mistake is underestimating clearing: roots left in the soil shift the asphalt later, and decomposing organic matter creates voids underneath.
Pro Tip Ask your contractor to mark all utility lines before work starts. Call 811 (the national utility locating service) at least three days before excavation begins. This prevents expensive damage to gas, electric, and water lines.
Excavation and Removal of Existing Pavement
If you're replacing an old driveway, excavation removes the old asphalt and any damaged sub-base material.
Michael's Paving
Excavation steps:
Remove the top layer of old asphalt (typically 2-4 inches)
Dig out cracked or unstable base material
Haul away debris
Reach the stable soil layer and grade it level
A standard driveway excavation goes 4-6 inches deep; thicker sections or poor drainage may require deeper removal. If old asphalt or weak sub-base remains, it will crack and settle unevenly, and your new driveway will fail prematurely.
Watch Out Do not attempt to asphalt over an existing cracked driveway without proper removal. The new asphalt will follow the cracks beneath it within months. You'll end up spending twice as much money.
Asphalt Driveway Sub-Base Requirements
The sub-base is the foundation of your driveway, preventing settling, cracking, and water damage.
Sub-base materials and thickness:
Material | Typical Depth | Purpose |
Crushed stone/gravel | 4-6 inches | Drainage and load distribution |
Crushed limestone | 2-4 inches | Compacted base layer |
Recycled asphalt | 2-3 inches | Binding layer (optional) |
The sub-base must be compacted properly. Loose gravel shifts under vehicle weight, causing ruts and depressions, so a professional compactor applies pressure in layers to create a stable, load-bearing surface.
Why the sub-base matters:
Distributes vehicle weight evenly
Allows water to drain away from the asphalt
Prevents frost heave in winter
Extends asphalt life by 5-10 years
At Advanced Paving and Sealcoating, Inc., we use quality aggregate and proper compaction equipment. This invisible foundation work determines whether your driveway lasts 15 or 25 years.
Key Takeaway A properly installed sub-base is 40% of your driveway's lifespan. Cutting corners here will cost you thousands in repairs later.
Grading, Sloping, and Drainage Setup
Water is the enemy of asphalt. Pooling or trapped water causes cracking, potholes, and premature failure, so proper grading and slope are essential.
Grading and slope requirements:
Minimum slope: 1% (about 1/8 inch drop per foot), anything flatter and water will not sheet off
Maximum slope: 10% for a standard residential driveway; steeper requires a transition apron at the street so low-clearance vehicles don't scrape
Water should drain toward the sides or ends, never toward the garage, foundation, or a neighbor's property
The finished asphalt should sit 1 to 2 inches below any adjacent concrete apron, garage slab, or sidewalk so water cannot back up against the structure
A proper slope is subtle, no noticeable hill, but water moves off naturally.
How the slope is actually built:
Grading is not a single pass. The sub-base is shaped and compacted in lifts (usually 2 to 4 inches), with the slope checked by laser level or string line at each lift.
Drainage considerations by climate:
Freeze-thaw regions: Slope matters most here. Water that sits on the surface in fall seeps into hairline cracks, freezes, expands, and widens the crack. A 2% slope and clean edge drainage are the two cheapest defenses against freeze-thaw damage.
Heavy rain regions: Add a swale or French drain along the low edge if the driveway discharges onto a lawn that already stays wet. Concentrated runoff will kill grass and erode soil back toward the driveway edge.
Hot, dry regions: Slope is still required, but the bigger risk is thermal cracking, not water. Keep the slope at the minimum 1% so the surface stays as flat as possible for even heat distribution.
Coastal and high-water-table areas: The sub-base may need a geotextile fabric between the soil and the gravel to stop fine soil from pumping up into the base and clogging drainage.
Common grading mistakes that cause early failure:
Grading to the house instead of away from it, sending water under the slab
Leaving a flat spot at the garage apron where water ponds and freezes
Building the slope only in the asphalt layer instead of the sub-base
Forgetting the finished driveway will be 2 to 3 inches higher than the graded sub-base
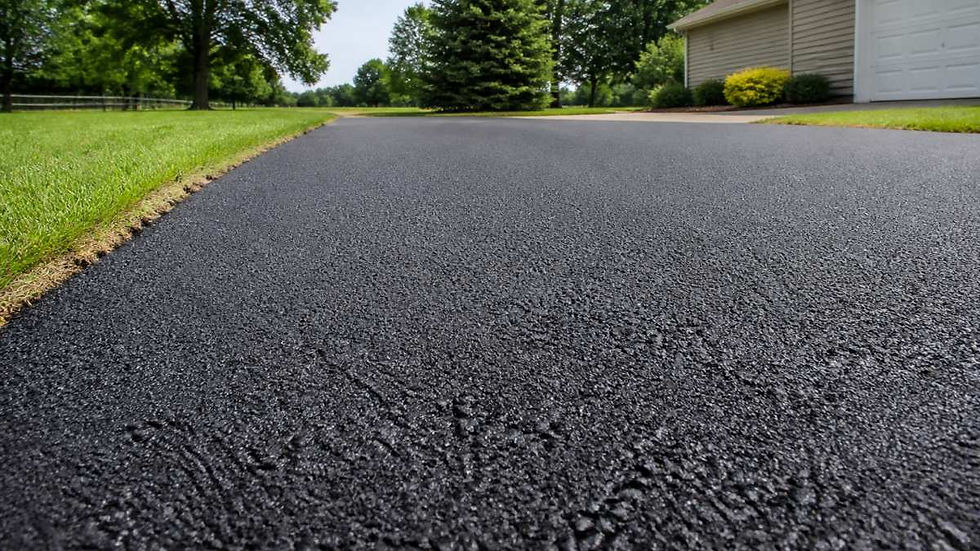
Key Takeaway Slope is the one part of the installation you can never fix later without a full tear-out. Ask your contractor to show you the laser-level readings on the sub-base before the asphalt truck arrives. If your driveway discharges onto a public sidewalk or into the street, check with your local public works department before installation. Many municipalities prohibit directing runoff onto sidewalks because it creates ice hazards in winter. Asphalt Mixing, Application, and Compaction Hot asphalt mix is delivered, spread, and compressed into a solid surface. Professional asphalt paving equipment laying hot asphalt mix on a prepared sub-base, with workers operating a heavy roller compactor in the background on a residential driveway The asphalt application process: Mix preparation: Asphalt is heated to 300-350°F at the plant and kept hot during transport. Spreading: A paver spreads the hot asphalt evenly across the prepared surface. Initial leveling: Workers use hand tools to fill gaps and ensure uniform thickness. Compaction: A heavy roller passes over the asphalt multiple times, compressing it into a solid layer. Cooling: The asphalt cools and hardens over the next 24-48 hours. Residential driveways typically need 2-3 inches of asphalt over the sub-base; commercial lots may need 3-4 inches depending on traffic. GET A FREE ESTIMATE → Watch the compaction process. A good contractor will make multiple passes with the roller, overlapping each pass. You should see the surface become denser and smoother with each pass.
How Long Does Asphalt Take to Cure
Curing time is one of the most misunderstood aspects of asphalt installation.
Asphalt curing timeline:
Phase | Duration | What's Happening | Restrictions |
Initial set | 24-48 hours | Surface hardens enough to walk on | No vehicles |
Partial cure | 3-7 days | Asphalt reaches 80-90% strength | Light vehicles only |
Full cure | 30-90 days | Asphalt reaches maximum density | Full use safe |
The surface may feel hard after 24 hours, but the asphalt is still soft underneath. Driving on it too early creates permanent ruts and depressions.
Why curing takes time:
Heat escapes as the asphalt cools
Binder (bitumen) hardens and bonds aggregate together
Moisture evaporates from the mix
Density increases and strength builds
Weather affects curing speed: cool, cloudy weather slows it, hot sun speeds it up, and rain during the first 48 hours can damage fresh asphalt.
The First 30 Days: A Day-by-Day Care Timeline
Days 1-2 (first 48 hours)
Keep all vehicles, bicycles, and heavy foot traffic off the surface
Do not let pets walk on it, claws leave marks in soft asphalt
Do not place lawn furniture, planters, or trash cans on the surface
A light rain on hot asphalt is usually harmless, but standing water in a low spot can leave a mark
Days 3-7
Passenger cars and light trucks may park after 72 hours in warm weather, or 5 to 7 days in cool weather
Vary the parking position to avoid concentrated pressure on one area
Do not turn the steering wheel while stationary; power steering scrubs the surface and leaves scuff marks
Keep heavy vehicles (RVs, dump trucks, loaded trailers) off entirely during this window
Days 8-30
Normal passenger vehicle use is fine
Avoid heavy vehicles, trailers, or boats until at least 30 days have passed
Do not place jacks, jack stands, or ramps on the surface, point loads will dent it
If installed in late fall, use a plastic shovel instead of a snowplow or snowblower the first winter
Days 30-90
The asphalt is now at or near full strength
Most manufacturers and contractors recommend waiting a full 6 to 12 months before the first sealcoat so the asphalt fully cures and residual oils weather off
Sealcoating too early traps solvents and moisture inside and can keep the asphalt soft
After the first year
Sealcoat every 2 to 3 years, depending on traffic and climate
Fill any cracks wider than a quarter inch as soon as you see them, before water gets in
Re-stripe or re-mark the edges if you have them
What Can Go Wrong If You Rush It
Parking too early: Permanent ruts that follow the tire path, unrepairable without cutting out the affected section.
Turning the wheel while stopped: Circular scuff marks that fade but never fully disappear.
Jack stands or ramps: Deep dents that collect water and become potholes within a season.
Sealcoating too soon: A soft, gummy surface that never fully hardens and peels within a year.
Heavy vehicles too soon: Longitudinal cracks along the wheel paths that widen with every freeze-thaw cycle.
Watch Out Parking on new asphalt before it is fully cured will leave permanent marks and weak spots. This damage cannot be repaired. Wait the full recommended time, and if your contractor gives you a longer window than this guide, follow the contractor's instructions. They know the mix and the local weather. The first 30 days determine whether your driveway looks new for 15 years or starts showing wear in year two. The single most common mistake is parking a heavy vehicle too soon. When in doubt, wait one more week. Advanced Paving and Sealcoating, Inc. provides clear curing instructions with every installation. Follow them exactly. Asphalt Driveway Installation Cost and What Affects Pricing Cost depends on many factors. There's no single "typical price" because every driveway is different. Factors that affect asphalt driveway installation cost: Square footage of the area Depth of excavation required Condition of existing pavement Sub-base material and depth Asphalt thickness and grade A small residential driveway (500-800 square feet) costs less than a large commercial lot (2,000+ square feet). Why comparing quotes is tricky: Some contractors include excavation, others charge separately Sub-base quality and asphalt mix grades vary widely Warranty coverage and financing options differ At Advanced Paving and Sealcoating, Inc., we provide free estimates with full transparency, explaining what you're paying for and why quality materials and proper installation protect your investment. Homeowners and business owners who want professional-grade asphalt installation with transparent pricing and proven local expertise. We handle residential driveways, commercial parking lots, and everything in between.
A well-installed asphalt driveway is an investment in your property's safety, appearance, and value. Ready to get started? Contact Advanced Paving and Sealcoating, Inc. for a free driveway estimate and let's discuss your project.
Frequently Asked Questions
What are the main steps in the asphalt driveway installation process?
The asphalt driveway installation process involves site preparation and clearing, excavation of existing pavement, sub-base installation with proper compaction, grading and drainage setup, application of asphalt mix in layers, compaction with heavy equipment, and a curing period before use. Each step ensures the finished driveway has proper load-bearing capacity and longevity.
How long does asphalt take to cure before you can drive on it?
New asphalt typically requires 24 to 48 hours before light vehicle traffic is safe, though full curing can take up to a week depending on temperature and humidity. In cooler weather, curing takes longer. You should avoid parking in the same spot and prevent heavy loads during the first few days. Professional installers will provide specific guidance based on conditions at your site.
What are asphalt driveway sub-base requirements?
A proper sub-base typically consists of 4 to 6 inches of compacted crushed stone or aggregate base. This layer provides drainage, distributes vehicle loads, and prevents settling. The sub-base must be graded to slope away from structures for water management and compacted to 95% density using heavy equipment. Without adequate sub-base preparation, driveways fail prematurely.
What factors affect asphalt driveway installation cost?
Installation cost depends on driveway size, existing site conditions, removal of old pavement, local labor rates, asphalt mix specifications, and climate factors. Additional costs arise from poor drainage conditions, thick sub-base requirements, or difficult access. For an accurate quote reflecting your specific project, contact a local contractor for a site assessment and free estimate.
GET A FREE ESTIMATE


Comments